At the St. Louis Angular Lunch this month, I talked about working with the recent Angular 2 alpha versions. The rapid changes to the Angular framework have made it difficult to pin down its usage. As a result information explaining how one might build a full application has been mostly non-existent. The goal of this talk was to explain some of the big picture concepts of how Angular 2 applications are composed and provide live coded examples. See the video embedded here, and transcript below.
Transcript
Here is the talk, transcribed to text. This is a lightly edited, draft transcription, so any errors are probably from that process.
Hi! Welcome everyone! I’m Paul Spears. As Kyle mentioned, I’ve been doing a lot of the Angular 2 investigation for us, and this summer we actually had a couple projects, we were like, “Alright! Let’s take some existing apps that we’ve written and see what it would actually take to start converting these to Angular 2. Let’s see what that looks like, try and get a feel for what working with Angular 2 is going to be like”.
At first it was extremely daunting. Trying to get anything to work in Angular 2 was next to impossible, but they’ve made incredible bounds in the last few weeks. Every time you turn around they’ve got a new release that has three dozen more features than you even expected them to have, and the documentation is just charging right along behind it.
So, had I given this talk three weeks ago, it would have been nothing but misery and despair, but since then, things have actually gotten a lot better. So mentioning that though…. This is me…. In particular Victor Savkin, he’s a member of the core Angular 2 team, and he’s got a great blog here. That’s the site for his blog. And on it he does a great job of bridging the gap between “how do you write a component”, “how do you write a service”, “how do you bootstrap Angular,” and then he goes and puts the full picture into perspective of saying, “Alright, now we are actually seeing the whole syntax, let’s talk about how Angular 2 actually works. How do you make an Angular 2 app?”
So if you’re going be looking for Angular 2 help online, this guy is pretty much the one and only source of good and up-to-date information that I’ve found short of the charging forward of the documentation. In the last week the documentation has actually been worth checking out and figuring out how they suggest you do it there. I saw a question back there….
[Participant] [inaudible 0:01:51] ……. who’s the head of the Angular Team, I heard you say “Victor’s the smartest guy on our team”. Please don’t tell Victor that. Victor’s going to [inaudible 0:01:59].
[Paul] And with that, that kind of bleeds through some of his blog posts. He writes blog posts like Angular 1’s original documentation. It’s very dense, it’s all very wordy, so it takes a few reads to get through it, but once you’ve internalized that, things really start to click together.
So the basic idea for this talk though is that I’m trying to very quickly get through a bunch of the high-level concepts that really tie together what an Angular 2 app is. We’re actually going to dig into some real code today. Real quick, how do you get started? You can get it pre-built off of Angular CDN … comes nice and packaged together. Just load it in with a module loader. You can find a sandbox where everything’s all put together.
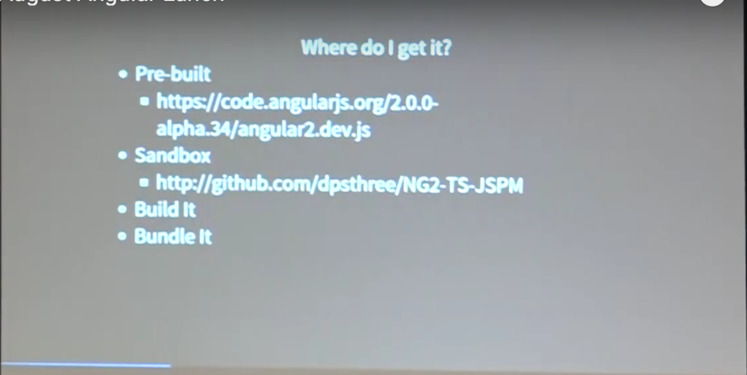
I happen to have one that I’ve made on Github, or you can clone it and build it yourself, or you can bundle it together manually with JSPM, which is essentially what I’ve done for you in the sandbox example.
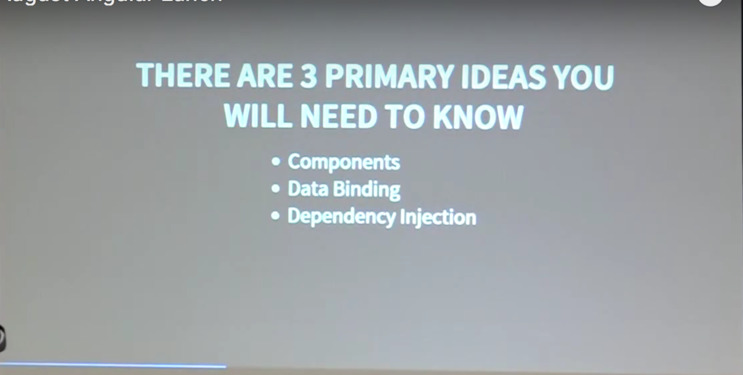
So Angular 3[sic] is primarily built on three key pieces. It’s their new component-driven approach to writing apps. They have a brand-new data-binding syntax, and they’ve got a brand-new dependency injection system. And you can get a long way down the road knowing just these three pieces. So let’s take a look at components. You guys have probably seen this tons of times. This is actually written in TypeScript, so if you get confused by some of the syntax let me know, and I’ll just kind of hand-wave over what is doing mostly.
But the idea is that we have a component, and this is going to be where our app starts. It says, “This is my app, what do I have inside of my app?” And it just keeps composing out from there. Everything in Angular is a component, in a more-or-less sense, so that everything that you write is something that can be injected. It’s something that you wrap inside this syntax of saying, “Hey, I have a chunk of code, and my top-level component is going to bring that code in.”
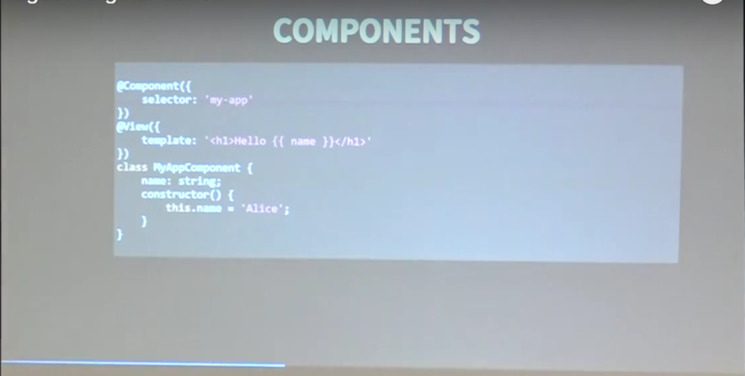
We’ll see this syntax again later when we actually start working on the app itself though.
So here’s that general idea mapped out. You have a top level app component, you’ve got some filters and this little task list example here. You’ve got a filters component, a talks component, and that’s comprised of several individual Talks. So that’s essentially how you want to think about writing your app. If you’ve got an Angular 1 app, this is step one for converting it.
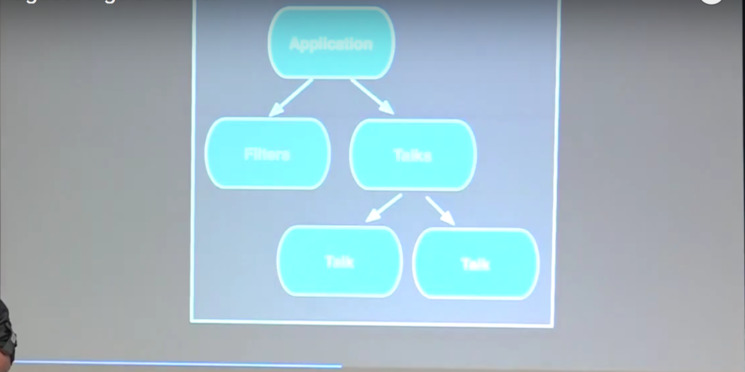
It’s making sure that you can re-think your original design in terms of this component hierarchy.
So, with data binding, trying to get data flow up and down your component hierarchy and out through your views, there are two primary ways to start that flow up and down. First, you can tell a component that it has properties. And it will then understand that, okay, I’ve got some data coming from my parent component. You can also say that a component has some events. And that’s a way of saying okay, I plan on emitting some information back up to my parent component.
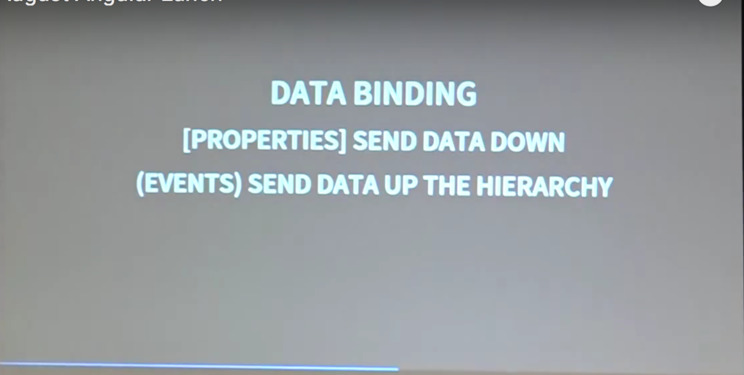
And we’ll see exactly how to bind these in the HTML right now.
So, here we have our component. This is a child component, so we have the app-level component, and this is just one child of it. Here we’re specifying that it has some properties, and we’re saying that that property name is provided by parent. We then follow that up by actually specifying inside our component inside our constructor that, “Hey, here’s provided by parent,” and then we can manipulate it however we want.
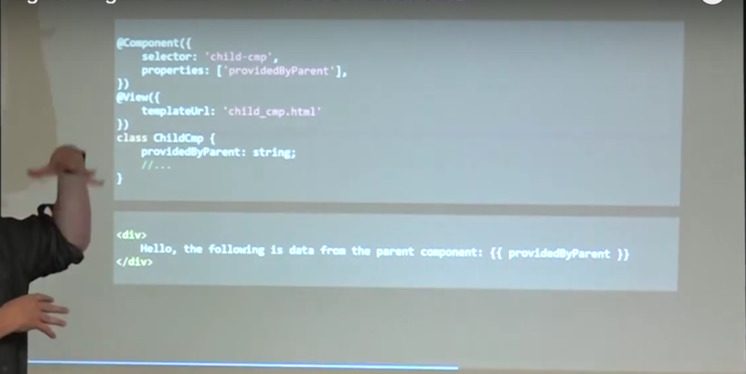
And finally you can bind to it directly on the template associated with that component. So now this is always going to display whatever provided by parent was set to, on the parent component.
A lot of what starts to happen here is you start to realize that, “Oh, components are essentially like directives.” And in fact if you ask it [the Angular 2 team] what happened to directives? They’ll tell you that a component plus a template is a directive in Angular 2. So here we’ve specified that this component has a template, so it would be considered a directive. With properties and events, you realize that “Oh, these are directives with isolate scope that have been using one-way binding and event hooks.”
So, if you think about components, directives with isolate scope, with one-way binding and event hooks, and you’re going to be in good shape. You’ve got a large step forward in how Angular 2 works in comparison to Angular 1.
So, the other half of the story is events, just like with the properties, you had to specify it on your component, likewise they’re saying this has some events, you name your EventEmitter, and then down here you say that it is an EventEmitter. [a][b]
[d]This is actually the parent template right here. The parent template says, “Okay, whenever the child data emitter emits something, call the callback function on me.”
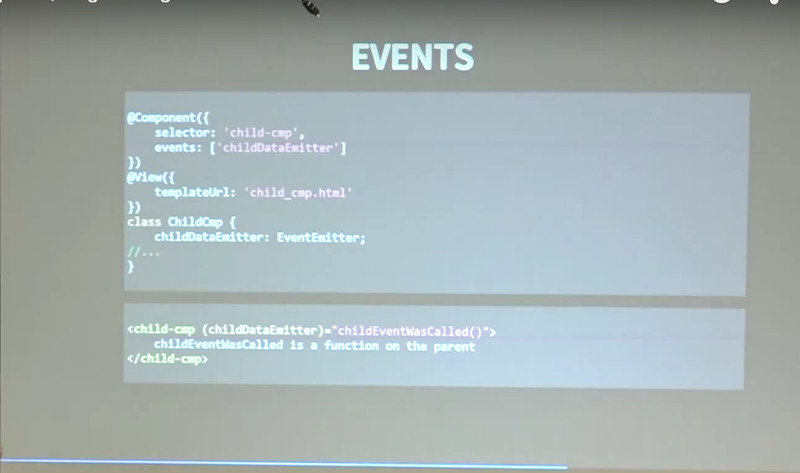
So, that’s how you get information back to the parent. It says, “Okay, this directive here is going to have something that’s going to emit data. I want you to listen for those events and call my function that I have.”
So, dependency injection. That’s the third key thing. It’s completely different. Throw out everything you knew about dependency injection in Angular 1. It does not apply. But with dependency injection, you kind of start wrapping your head around it. Think of it also as a tree. If you inject something at the top, it becomes automatically available to anyone who wants it further on down the hierarchy of your components.
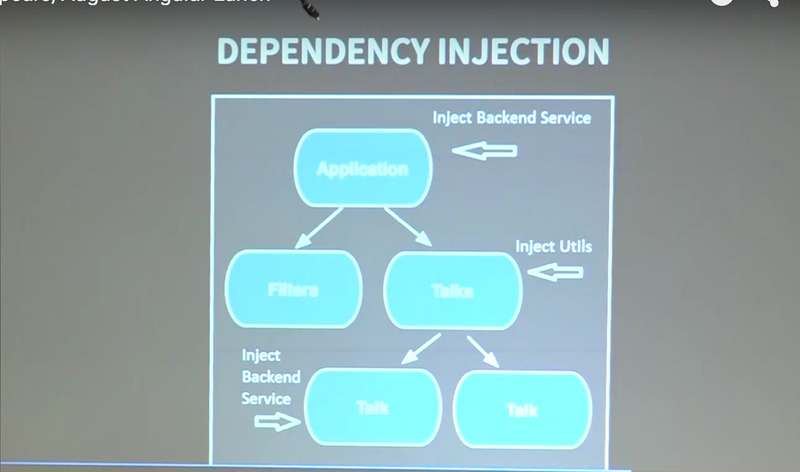
If you inject something down here… so if I inject utilities into Talks, then that becomes available to Talks and its sub-components. Likewise, I inject the back-end service up at the top, and that becomes available everywhere in my app. In Angular 1 everything you injected was a singleton. Well in Angular 2 you can actually say, “I want to inject a new version of my backend service down here”.
Let’s say we manipulated that backend service somehow that isn’t compatible down here, well, inject a new copy, and you have it available to you. And again, any child component of that. So, there’s a lot more to the store than that, but again this is kind of like your first steps. You can really start writing some big apps just with this piece of alone, just with this bit of knowledge alone.
Alright, so this is kind of putting together a few of those pieces that we just looked at. And let’s say I’ve got a component. This is my app component. And I’m saying that I’ve got some bindings to MyThing. MyThing can be just about anything. They’ve made it so that the injector can inject services, it can inject other components, it can inject DOM node elements, it can inject just about anything.
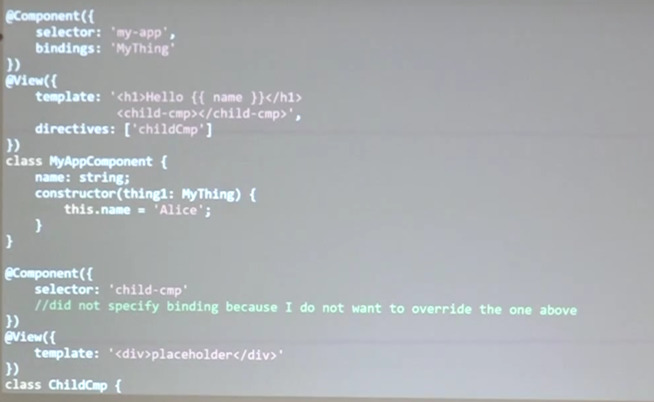
So if we had something that we want to inject this is how we do it. We use the bindings keyword inside of the component, and then down in your constructor, you have to say that not only do I want to be able to bind to My Thing, right here I’m saying that I actually need a hold of it. Give me a hold of it right here, and then you can give it a local variable name, and then you can access it. And then down in the child, right here we didn’t specify bindings, because that would then say, “I want a new copy. I want you to create a new version.”
Instead I just request it right here in my constructor, and it knows to climb that hierarchy looking for someone who had requested that injection earlier. Yeah?
[Participant] So, if you did specify bindings in the child does it override all the bindings or does it just… you can like add new or replace….
[Paul] It overrides them from this point down is the component hierarchy.
[Participant] Okay, but it overrides all the bindings, not just this specific one?
[Paul] No, just the ones that you request.
[Participant] Can you go over that directives–template thing?
[Paul] Sure, and we’ll see this a lot more, but I need directives here, saying that I have this child component directive, so that Angular actually… this is Angular trying to play nice with things like web components, because you have just about anything in your HTML. So this is how you indicate what’s actually an Angular directive versus some other non-standard HTML thing.
And so here we’re saying, “Expect there to be something called child component inside my template.” And right here we actually see I’ve got child component right here inside the parent template. This says, “Expect it to be there so it knows to actually sync it up with the directive we declared below.”
[Participant] Hey Paul?
[Paul] Yeah.
[Participant] In Angular 1, the injection kind of worked by name, essentially. How does it know, if you list the button, how does those get associated to the right thing in the constructor calls.
[Paul] A bunch of bindings. So, back up at the top right here.
[Participant] Is it a type or something? That one used to have one, and then you have one, right?
[Paul] Right. Well, this right here is actually just a string. So that survives any kind of annotation like we saw before. It does it actually down here, when we request MyThing. This is actually where it understands what to go look for. This is actually a reference to a class called “MyThing”.
Up here, this is just a way of saying that, “Yes, this guy is actually wanting a new copy of MyThing”.
[Participant] Yeah, but I’m trying to understand, let’s say you list one. It’s kind of obvious that the one you list is the one you have described in the constructor.
[Paul] Right, that also accepts an array.
[Participant] So, is it positional, is what I’m asking. Is it in an array where it has to be in the same order?
[Paul] No, that array and its order has absolutely nothing to do with how it’s going to inject. It’s just saying that if you’ve requested an injectable here, then expect to inject a new one.
[Participant] So it’s a good bit like a class or type that’s somehow using…
[Paul] The type, right here. This is an actual reference to the class.
[Participant] So that’s wired in pretty deep to [?] understand the type.
[Paul] Yeah, yeah. What you’re talking about with ordering, and you have to name look-up kind of stuff, when you drop down to doing this in ES5, you see that very prevalent that, “Oh, hey there’s actually some sort of matching here in ES5 that has to take place.” Because you actually have one more step that you need to do, to make that connection between here and up top.
Okay, so I just wanted to get through that real quick so we can actually get to some live code. So, that’s what we’re going to do now. And everything we saw, we’re going to see again, time provided.
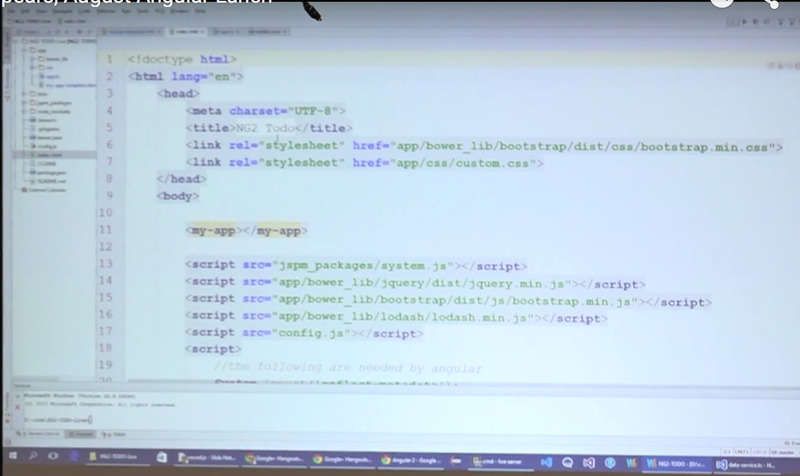
Alright. So, I’m going to go ahead and pull up… I’ve got a little bit of boilerplate already in place, I’ve already got Angular here. It’s already loaded up and ready to go. If we come over here we can see what I’ve got so far. Just a simple Hello World.
[Participant] Too small.
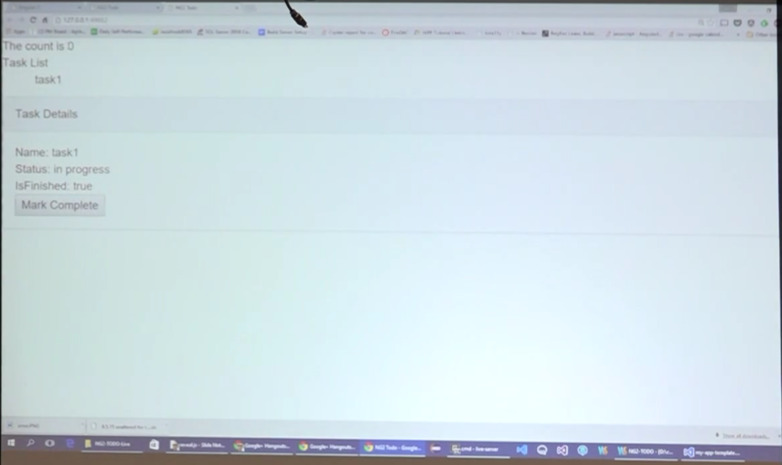
[Paul] Too small. Good point, that’s too big. Alright, so this is what I’m aiming for, it’s just a simple little todo app. Along the top it tells you how many tasks you currently have that aren’t finished. Along the left you’ve got a list of tasks, and when you click on one you actually see the details of that task on the right. Then you can mark it complete and see that change here as well as see that count reduce from having clicked on it.
So that’s the goal, we’ll see how far we get. Alright, so to start let’s go ahead and take a look at app TS. So, this is really the starting point of our app, and we can see that because I’ve imported it using JSPM systemjs.
We’ll handwave over that stuff for now, but just know that this is where I’ve declared to go look for some code. Then down here at the bottom I’ve told Angular to actually bootstrap itself using MyAppComponent, as the actual application level component. So we actually make that declared explicitly right here.
[Participant] Little bit bigger.
[Paul] A little bit bigger, okay.
[?]
[Paul] So here, we’re actually saying “Bring in stuff from Angular 2”. So this is just a module system.
It uses, technically, the TypeScript module system, but that’s pretty much exactly the same as the ES6 module loader. Here we’re saying go ahead and bring in all this stuff from Angular 2. Down here, we’re specifying that I’ve got a component, and you’ll actually see that I’m requesting this component when you see my-app inside a template.
Now, here we’re saying, “Here’s a template associate with this component, whenever you run across it.”
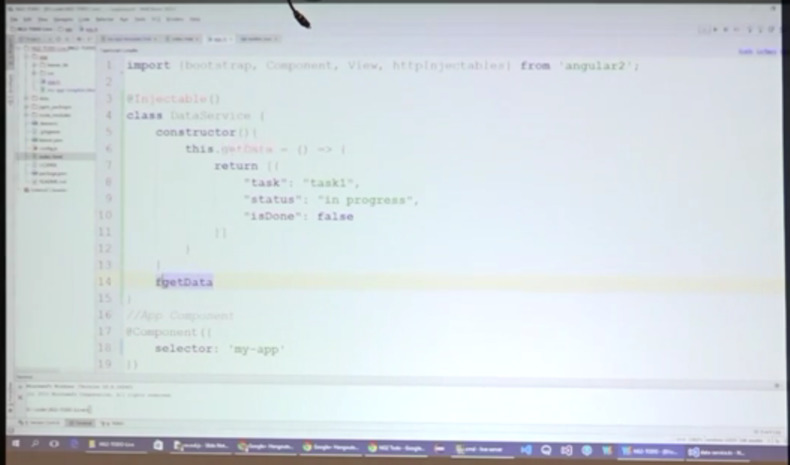
So, this is kind of our starting point. This is where we’re going to have to bring in the data. To do that, we’re going to do inline right here, create a data service. To do that, I’m going to say, @injectable. And this just creates a generic thing that can be injected.
That actually doesn’t have any properties. After that, we just say class, DataService. So, I’m just making a generic javascript class here. I’m wanting to set up my constructor. My constructor is going to have a function called this.getData. That’s going to be a function that has no parameters. This is just arrow syntax from ES6. So, this is just a fancy shorthand way of saying it is a function.
I’m going to return an array of objects with a task, and it has a status. Finally an isDone property that’s boolean. So, we’re just going to start right there with the simplest one we can for now.
[Participant] Why would you have method in the constructor versus writing it as a method of the DataService class?
[Paul] Habit. Really, that’s just what it is. Habit for me to have done it that way, coming from Angular first, and then into to javascript world. This is how I wrote all of my services and other constructor functions in Angular. So, it’s kind of a bad habit. I could have just said, getData, or function getData, like that.
[Participant] …If you had a pre-existing service from an Angular 1 application, you could just take that function and stick it right…
[Paul] Exactly. You could copy the contents from dot service and drop them right here. Now we have a simple data service that we can call getData on. Let’s move now back to the app component. Here inside our constructor — we’re going to bring him in. The first thing we need to do is say, “I’ve got bindings set up that we need that’s going to request DataService”. Actually, that’s not a string. That was a typo earlier. This is just — “go grab DataService”.
Here I can say that I want to use the instance that we created right up here. We’ve got our DataService, but we need to be able to count inside our parent app — our parent module — We need to count how many tasks are in there. We’re going to need something like a task count to bind to. This is saying that that is a number. Inside here I can set that.
this.taskCount equals — myService.getData. That returns the data .length. So now we have a way of actually showing the count.
Let’s start from there, and now we can go over to our template and bind to this. So, it’s that familiar one we’ve already seen, and we’re going to say, “I want to bind to taskCount”. Let’s see where we are now. We’re off to a great start.
It’s complaining that injectible is not defined because you’re going to need that up here. There we go. Now we’re starting to see some progress.
So, now we need to start thinking about the child components. So, let’s go ahead and work on one of those. So, we’re going to bring in now the task list. To do that we’re going to say “@component”. And we’re going to give it a selector. This is how we identify what this is any time you come across it in the html. And this one’s going to need some properties, because he’s actually going to get his list from the parent.
So to do that we say hey, I’ve got some properties, and we’re going to name that property “tasks”. And it’s also going to have some events because whenever we select one, we want it to update over on the detail pane. So we’re going to have an event called select. And this one actually has a view associated with it since it’s going to display our list.
We’re going to have to set up a template url.
And we’re going to place this guy in app/tasklist.html. And since we’re going to be repeating over those tasks, we’re going to need access to ng-for. It’s the looping over the various data models. So to do that we actually need to declare the fact that this guy’s got an ng-for directive on him in some place.
And that’s exactly where we’re headed next, to use that we need to say “hey, ng-for is something else that we need to bring in”. Now this model of oh, I’m bringing in all these things — this isn’t actually that bad. There are a lot of things that you can import that bulk a lot of the commonly used things together, but this is just the individual import that we would want. Alright so now we can —
[Participant] So does that mean that one way or another, using some of the shortcuts you just talked about, you potentially have a list of every directive you use at the top of [?] everything that possibly uses it? So you can’t just start using other directives down deep inside… you might have to walk back up the code and find [?]
[Paul] Yeah, yeah. Ideally though, I think what I’ve seen is that they’re working on having it so that you just have common directives as something that you import at the top, and then you’re done. Then anywhere else you do still have to specify which directives are on that specific template, but you don’t have to keep reimporting them every time.
[Participant] … talked about the fact that they are at what they call the sugaring phase in the API where its capabilities are fairly nailed down, and now they want to make it so that it doesn’t … to use it, and this is one of the main points to talk about. It’s like, we don’t want you to have to have a giant list of directives you carry with you everywhere.
So they’re figuring out how that works in practice to make that easy and frictionless.
[Paul] Yeah, and that’s kind of what I was alluding to earlier. I was saying how they are making these rapid changes every three weeks to where all of a sudden, everything that you thought you knew, it starts to go away and melt away, and you don’t have to jump through as many hoops.
So to finish up this task list component, we need to actually specify that not only do we have this property called tasks, but we need to say that it is actually part of this task list. And he is an array of — and we need to specify that select is also a part of this class, and he is an eventEmitter. That is something that we also need to bring in here. We’ll see what that means and how to use it here in a moment.
So, now we can actually make our constructor. And we’re going to set this.clicktask. So we haven’t seen this before. This is something that I’m actually creating right here, like Mark mentioned before, I don’t have to necessarily make it inside the constructor. That’s just where I end up putting them a lot of times, when I’m messing around like this. So, this.clicktask … it’s going to be a function that accepts an individual task from that list and performs the following. It’s going to say this.select (so the EventEmitter up here) .next. That is how we are going to emit an event. And now anyone listening for the select event is now going to be notified with whatever I’ve placed right here. So I’m going to send in the task property of the task I clicked on, so again we have this task guy here.
I’ve sent in an individual task right here and I’m sending an individual property. So, whoever is listening for that event will receive that data. So, now we need to work on the html for it.
[Participant] …27, should that just be the EventEmitter definition, or are you meaning you’d do it up like that?
[Paul] Yeah, I meant to hit new. I don’t know why, I’m still learning quite a bit. Everything I’ve seen says you actually want to new it right here. Alright, so let’s go ahead and dig in it taskList.html now. Okay so for this, pretty straight forward we’ll go ahead and give it a quick label. We’re going to have a UL inside of that we’re going to have some list items, and here I’m saying that whenever you click on this list item, execute the following function.
clickTask(t). We’ll see where that “t” comes from here in a second. Now we’re going to use that ng-for.
*ng-for = … I’m just going to type this out and then talk over in a second what I’m doing. Yeah, lovely isn’t it. Finally we come in here and you bind to t.task. So, some of this I’m still trying to figure out exactly, but, long story short, before with Angular 1, things like these were attribute level directives that placed inside of an element.
But, really what’s going on here is that this is sugar for actually having nested one element inside of another, and it will actually de-sugar it to that. So, it actually creates an additional element inside the shadow DOM, where it actually ends up saying, “this is actually an ng-for where I want to show this content”. Then these are needed to track where that stuff is coming as it passes it down.
A lot more stuff is needed, and this is as best as they’ve sugared it to right now. But this is separate from the ng-for. This is just saying that when you click on something go ahead and call that function that I specified earlier, right here. So when I click that’s what’s going to fire off the event and the task that I passed into it was right here.
I’m grabbing t from my local variable t that I’ve declared coming off of each task. Each one of the task items.
So … with me for the most part, even though the syntax is kind of weird? Alright.
[Participant] If the hash nine equals [inaudible 28:19]
[Paul] Yeah, that’s the part that I really don’t know.
[Participant] [inaudible]
[Paul] Yep. It explicitly says that “this” will not work. It needs this to help track where data is coming from and in what order.
[Participant] That is weird.
[Paul] Yeah.
[Participant] …Yeah, actually the star on the ng-for, there was a murmur that when through the crowd when I saw it… First I was like the star may go away, don’t freak out about the star. The thing a lot of people know is that it used to be a bang. And everybody was like “Not ng-for!?!?”. Why do people write that, and that’s when they changed it to a star.
The ng-for is under heavy debate inside the Angular team. Because just like in the presentation right here you already see people go “Huh?”. There’s the same thing happening inside Google.
[Paul] But the most frightening thing is that this is actually a three-stepped-sugared version of this. Alright, so that’s our task list, but now we need to plug in to our main directive here. Alright, so let’s head back to the app template. Now here we actually need to plug it that child directive. So now we’re going to say “the-list” and then we’re going to bind in tasks and that has to come from somewhere on the parent component.
So we haven’t actually provided anything for that so we’ve got to fill that in later. Then we want to say whenever the select event inside the list is fired, I want you to call my selectTask function and pass in whatever that event was that fired.
So, if we go back to app ts, here is my constructor, so we’re now going to need that selectTask as well as the task list itself. So we’re just going to go ahead and this.tasks = — we’re going to just assign it right here, and then reference it down here. Then we need one more piece and that is the this.selectTask. So it’s a function, it accepts a task name, and I’m going to cheat and use low dash to do a lot of the work.
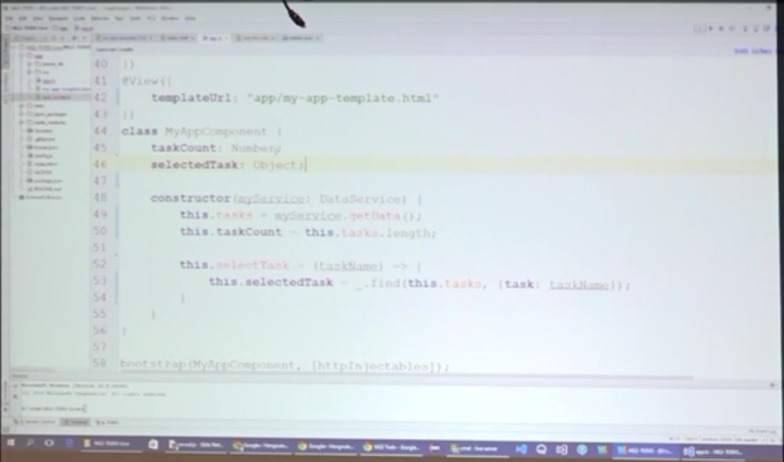
So it’s going to set something that I haven’t declared yet called the selected tasks equal to _.find(this.tasks …And I wanted to find where the task property was equal to the task name I’ve passed in.
So let’s go ahead and add a couple more types here. So selected task is an object. Tasks is an array of objects. Okay so that’s the three things I have so far. Select task is a function, but I’m not going to bother with that one right now.
Alright so now we’re starting to see a little bit more of the picture. Let’s see what we’ve got left. I now we need to set the tasks over on our template. So this is the guy that’s actually on the parent component, this is the guy that’s actually inside the child. So we’re kind of passing this data straight on through. So we save it and go look at it now, see what I’ve broke. Typo on line 34.
[Participant] [inaudible]
[Paul] Yeah, he always complains. Webstorm really doesn’t know what to do with that, there are three things that are weird to plain javascript at the point. So it was actually complaining about unexpected token right paren on 34. Well when all else fails I’m about to copy and paste my working example, just to move along.
[Participant] We can’t really tell the difference between a curly brace and a parenthesis from back here.
[Paul] Yeah, I’m right up on it, and I can barely tell. What’s strange is that there is no right paren on line 34.
[Participant] Maybe just show your example.
[Paul] Yeah.
[Participant] On line 24 are there two curlies there?
[Paul] There’s a curly and then a paren.
[Participant] Do you need to import underscore to use it?
[Paul] I’ve already got it. I put it in globally. Alright, there, that’s a low dash actually. Alright well I’m going to cheat real quick and copy my working example here.
I went and hacked a couple things in real quick. So this.taskList = myService.getData. Okay, so that means just need to update one more thing over here, and that was at this, and it’s now called taskList. Now what does it have to say about it, I’m sure there’s something.
Well that’s special, same exact error. On line 34, so it’s actually probably about something above that. Maybe something in my task list. ng-for, comma comma comma, select. Well, let’s go ahead and grab him too then.
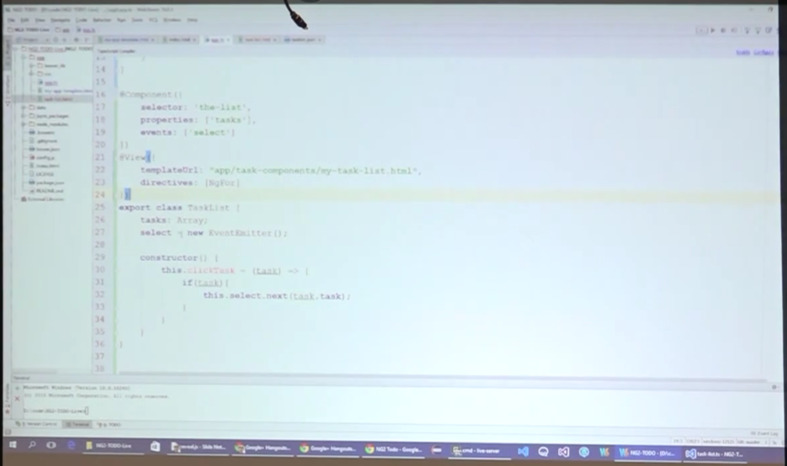
[Participant] It is surprising about line 27 that that’s valid syntax. I would’ve thought you have to say select … EventEmitter and then down in your constructor say…
[Paul] Yeah, TypeScript accepts that. Well, I’m going to cheat again and copy this working example. It’s much happier about something.
[crosstalk]
[Paul] There you go.
[Participant] … for the EventEmitter.
[Paul] Now it’s complaining about TaskDetail because I haven’t put him in yet. Alright, so here I’ve got to update my template. task-list.html. Alright, I think we’re closing in on it now. There you go.
[Participant] There we go. The count is …
[Paul] So, I broke the count.
[Participant] The count didn’t …
[Paul] That’s because I didn’t actually set them here… Get some of my left-over boilerplate, move him to the right spot.
That’s right. So, as you can tell, working with Angular 2 is an absolute breeze right now. Alright, so we’ve got that going, we’re going to do one more quick thing… kind of running out of time. I’m just going to drop that guy in, just so you can see the whole story.
We’ve got the list, now we need the details. So, I’m going to drop him in right here, he’s got a property which is a task, an event which when I check complete task will propagate back up to the parent.
Beyond that, this isn’t anything you haven’t already seen before. This is unnecessary in this example.
Then likewise, we need a template form. And, to do that, we need to make new file. I’m just going to drop this right in, just basically binding to that task that we passed in from the parent and looking at his properties. We’ve got to click on the button that says “Hey, whenever you click this, call the finished function on this component.”
Then we need to plug in our TaskDetail on the main app. One final step is to actually refer to it right here. To do that we call the directive, throw in some CSS boilerplate, say “Hey, the task is actually going to be my selected task. Whenever the complete task event is called, call my MarkCompletedEvent, and things propagate back down the other direction.”
So, now lets see if we got it all running. Close, but no cigar. Oh, but yep, here it is.
Now I’ve skipped a bit of proper initialization. But if we refresh it, I click the task, we see the details, we can mark it complete. The count goes down.
[Participant] Wow.
[Paul] So, yeah. A lot of work just to have three little pieces of data change. A lot of work.
[Paul] So, short of throwing that all on the same component, that was to the best of my knowledge the most minimal way to actually achieve that. So, any questions? I’m sure there are plenty.
[Participant] I have a question if nobody else does. I know that you told me the answer but probably nobody else, and so, how recently were the alphas good enough that you could get through this with the moderate level of difficulty….
[Paul] Alpha 34. That’s like six weeks old. Beyond that, you just lose so much sugar, and the documentation is even more thin than it is now. Blog posts aren’t relevant, and it just kinda starts to fall off.
[Participant] So, do you feel like as of August 2015 is a good time time to start working with this stuff?
[Paul] That totally depends on if you think you’re gonna like it because it is not Angular 2. It is a new thing. It only resembles Angular 2 in that there are some like, “Hey, I kinda remember that guy from Angular 1.” It’s not so much a, “Okay, so this is just like Angular 1.” Nothing feels like that. At least not yet. The sugaring may help drive it there more and more, but even architecturally it’s baked in that you have to do your app completely different in how you structure them. I put together a list of things you should do to help prepare your app today in Angular 1 for making that jump to Angular 2.
That’s a long list of things to go and change inside an Angular 1 app across to board, especially if you didn’t start off doing that. I think to most important thing that I’ve seen now, though, is points one and two. If you don’t use ng-controller and you compose your app of isolate scope directives, you’re gonna have a far greater chance of actually making to jump to Angular 2 than you would otherwise.
[Participant] Yea! I was telling my students the right thing.
[Paul] Yeah.
[Participant] [inaudible 42:07]
[Paul] Yeah, Mark.
[Mark] I wonder if it’s really worthwhile to go through all of these steps. Suppose you’ve got a really large Angular 1 app. You’re gonna have to change so much. Maybe you’re better off to just plan on, when you’re ready, you’re going to rewrite your app.
[Participant] That’s what we’re doing.
[Paul] That’s what everyone is asking, and no one’s really responding to it. It’s like, well, if you’re really that worried about it then don’t make an Angular app, or just be happy with the support that’s gonna be around for Angular 1 for however many years it is now. That’s a good question that you have to ask because when you write your Angular 1 app like this, you’re cutting a lot of the legs out of to feature set of Angular 1.
[Participant] In my experience, writing to REST services that are behind your app takes a little more time than to UI anyway. So, at least you still keep your existing REST services.
[Participant] Paul, of those things how many of them were already considered good practices? On the umpteen Angular apps you’ve work on …
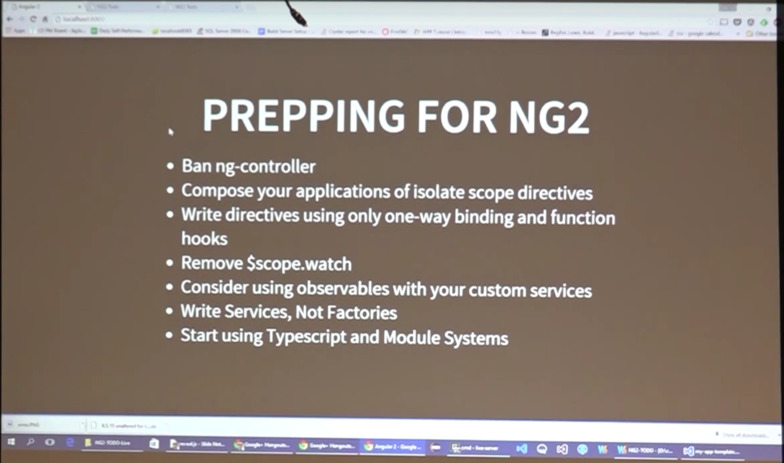
[Paul] Well, using service and not factories, there’s other benefits for that that I always recommend just because it’s easy to port code into and out of, and easier to port code into and out of an Angular app if you use that pattern. And then, $scope.watch, we always recommend avoiding it like the plague. The only time that we’ve been like, yeah, this is a common use are it is if you need to observe what’s going on in an injected service inside of a controller, and that’s about the only place that we’ve done that and not been like, “Shame on you,” for it. But now that entire construct is going away, and if you can write your services to — use some sort of observable library to return some sort of observable object — then you can be one step ahead by — because that’s how you’re going to do it in Angular is you’re going to actually observe service properties instead. If you can do that, you’re also one step ahead because you don’t have — you’ve eliminated your last need for a scope watch.
Then directives– We strongly recommend using directives whenever possible, but this pushes it to the extreme. Angular 2 really goes off the deep-end there in terms of everything have to be in a directive. It’s mostly good practices from Angular 1 in short, but this drags it to where it doesn’t make sense in Angular 1 to go this far.
[Participant] With double binding going away, that’s just a [inaudible] components and services and such, right? So you’re gonna be communicating those via events. Does that mean when I modify an event, every time, I need to stop thinking of it in terms of “I have an object that we both are watching” instead of…
I am taking some action, and they know what that action is at the top and then also, how does that affect to the DOM itself, like to the display. If I change that object, does the display update? …
[Paul] So, two-way binding is completely gone — does not exist in Angular 2. How it happens is the property is the properties — those bind in one direction as down. So, the data flows down. That’s the only way to get the data to flow through an Angular 2 app that component hierarchy. It is the execution of an event emission that actually has a way to hook into functionality that exists higher up. And so what’s going to happen is you’re going to get this two-pass process that goes on where it will propagate any changes down the property chain in the components. Those may or may not result in additional updates being called. Or along the way, rather, updates may have been called and as it goes back, it will go back up that chain as needed. It’s got this complex, observable pattern that I’m n– I don’t have enough of my head wrapped around to understand like where to truncate that process and understand that it doesn’t need to go any further in various areas — up or down.
But, yeah, the two-way data binding is gone. You can only go down or call functions up.
[Participant] At the very bottom is the actual display ….
[Paul] The very bottom is the view.
[Participant] …Go down, right? If I modify it, it shows up in the html.
[Paul] So, that you could have chunks of that view actually all the way through, so in this example, I just had that really tiny template that had nothing but these guys in it. But, yeah, there could be hundreds of lines of html that has nothing to do with components inside here, and likewise for every component beneath this. So, the view is interspersed through all the components.
[Participant] Sorry, I’m trying to tell about to …
[Paul] right. So, if we go back to the — this guy here. Down means that if a value changes here, it knows that it has a property registered on it, so it has to change it here. Likewise, it will keep propagating down. It actually updates all that in memory before redrawing the DOM.
Out of time? All righty.
[Participant] I’m assuming — Sorry, Mark. … scared by the fact that two-way data binding is gone, gone, gone. It is gone? There is a shortcut syntax that is being provided that combines a property with events that looks a lot like two-way data binding. So, don’t think that you’re going have to double the size of your templates just to get data flow moving what is effectively two ways. You still have one way data binding as in the data flow only goes one direction, but you can couple that with an event so that it in practice it looks a lot like two-way data binding…
[Paul] Then they’ve also got a whole set of form controls that automatically do that — Even that sugar isn’t added on top of with things that they expect you to need to a binding for. And they emulate that look and feel from Angular 1 in the forms components.
[Participant] Back in your javascript code where you were adding a method to the object inside the constructor, I just want to point out that that’s not exactly the same as putting it as a method of a class because the way it’s been set up there, every object you create … a new function … outside…
[Paul] right.
[Participant] You’re using more memory.
[Paul] Yeah, I know.
[Participant] We’re gonna run out of memory.
[Paul] I guess that’s all I’ve got. Thanks.

