Filters are the “Language” of JIRA

Often I describe JIRA as a large set of Legos in a bucket. JIRA is one of those tools that is so flexible it is hard to get your head around how to use it.

The Lego analogy works on many levels. Using the predefined project types, JIRA Agile, JIRA Service Desk, etc is like opening Lego kits. Yes, they still include regular legos, but the fun stuff only works when it is built in a certain way, and will only make what someone else imagined. While working with the standard block shapes you can put together almost anything you can imagine. With this in mind, there are three main components of JIRA that make up the core building blocks of a system: issues, workflows, and filters.

Every feature in JIRA revolves around one of the three. I want to focus on filters and their broad impact in JIRA. It is incorrect to think of all the issues in JIRA broken up into projects because this is simply not true, even a project is simply one filter of the greater issue store. All the issues created in your JIRA instance are in the same bucket. When JIRA moves to display items to the user it first looks to see what subset of issues this user has permission to see (regardless of project), and then shows the list based on the filter being used at the time.

A good way to think of this concept is the diagram included here. There is the larger issue bucket of the whole instance, and individual users can see the issues that span the projects, issue security, and permissions given to them. They are then able to apply filters within that cross-section they have rights to.

Filters are used for all Reporting, Agile boards, Dashboard Gadgets, Wallboards, API calls, and of course filtered issue lists. If you are looking at more than one issue on your screen, filters are at work.

Once you grasp this idea you can really start to use filters in a powerful way. I often see the light bulb come on in either day 1 or day 2 of our JIRA Boot Camp class. Users will often say, “So that is why <insert situation here> happens!” and then they will be empowered to fix some long-standing problem that has caused frustration with JIRA.

An important aspect of filters that is often overlooked is sharing. The lack of understanding runs across a wide spectrum. On one end people struggle with the idea that users cannot see a particular Agile board or a gadget on a Dashboard without having the necessary filter shared with them. Often in these environments the company is only organizing everything at the project level. These are also often the companies that only use the built-in issue types and avoid customized workflows. They will find it hard to have desired data and functions available where users need it.

The other extreme is the system where everyone automatically shares every filter with all users. In this situation people can easily get frustrated by having hundreds and sometimes thousands of filters to deal with. Over time the list just gets larger and larger as employees come and go within the company. Imagine if an average employee has 25 filters and the company turns over 100 employees per year. In two years you could have 5000 abandoned filters in the system.

It does not help that the interface adds confusion to an already complex idea. in the words of Inigo Montoya:

“You keep using that word, I do not think it means what you think it means.”

On the main filter page is this big, obvious button that says “Share”. This is not actually how you share a filter! You must click into the less obvious “Details” hyperlink and add permissions to the filter. I do hope this gets fixed soon by the removal or re-purposing of the share button.

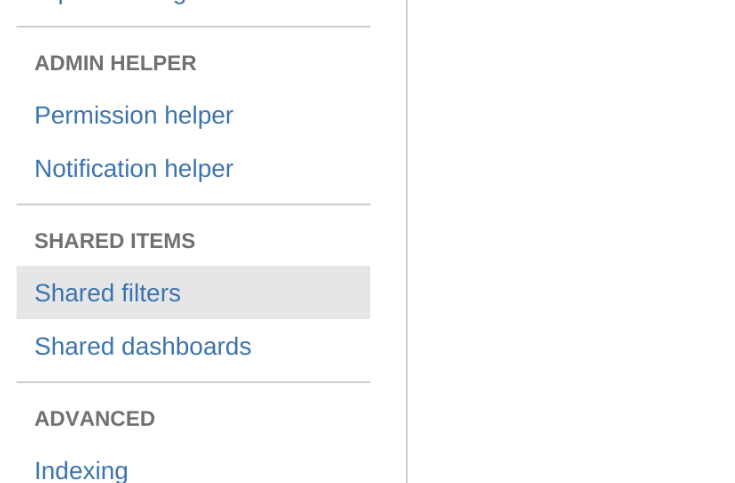
Neither of these extremes is actually necessary. The proper balance is to have an intentionality to sharing of filters and an administrative discipline to curate the issue list in the System Admin area of JIRA. See the image shown. In this area an admin can delete abandoned filters and change ownership of important ones. Keeping this list manageable is simply good JIRA hygiene.

Filters are a core building block of JIRA. Understanding them and guiding your users to apply them properly can dramatically improve the user experience.

JIRA Customization

Technology platforms mature and improve over time. The Atlassian ecosystem is no exception. One area where Atlassian has matured dramatically is in supporting customizations. In the past customizations were a real “wild west” edit the database and file system approach. Today we have flexibility in configuration and a strong API. Often people have a hard time letting go of history, especially with technology we feel has failed us. There are many that assume that any customizations are unwise in JIRA. I wanted to cover JIRA customization and contrast the past with the reality of today. Later in the article I will lay out a few best practices as well so you can get what you want from JIRA without risking too much.

In the not-too-distant past, a typical JIRA installation might have played out something like this:

A group in a company obtains a copy of JIRA Server, installs it, and immediately jumps into configuring all the admin screens to get projects running. They start by using one of the built-in workflows with all the standard transitions. As usage expands, needs are found and are either accommodated by the administrator or met by a nifty add-on that did what was wanted out of the box.

Once in awhile something very specific will be desired to increase efficiency or user adoption, so the admin will go in and modify the database, add some scripts, or edit some of the configuration files directly. A few months later they realize they cannot upgrade JIRA because they would lose all their customizations that they depend on–or perhaps worse, they upgrade and most of their functionality is broken.  

Some companies invest the hours to fight through the upgrade pain and customize a much newer version, but many companies simply stay at a very old version until the application is abandoned. I recently spoke with a company that was still stuck using 4.x, while 7.x is the current version! This cycle is far more prevalent than people realize. Many smaller and mid-sized companies find themselves in this position, I have multiple students in every class facing this very specific dilemma.

Fortunately JIRA customization is far different today than it was a couple of years ago. Atlassian has done a great job moving to a clean API that allows for significant external input while increasing the flexibility of the system. There is a new danger I will talk about in a moment but customization can live across version upgrades today, unlike in the past.

JIRA Customization Best Practices

I typically describe JIRA as a big box of legos. Used properly there are few scenarios that cannot be accommodated with the base system. When approached in an educated way it is incredibly flexible. Here are some guidelines around customizations I share when consulting on JIRA implementations.

  1. (Click to Enlarge Image)
    (Click to Enlarge Image)

    Understand completely how projects come together. Utilize “Custom Issue Types” to break up your workflows, allow for clearly defined field configurations, and ultimately better reporting. Here is the diagram we use in our classes to teach students how to correctly put together a project.

  2. Search for a way to accomplish your goal within the base system. I commonly encounter cases where people moved to Add-ons to do something they could have accomplished by customizing filters, issue types, workflows, or other elements. Only use Add-ons that are truly necessary.
  3. Do not view applications in the marketplace as similar to Android or IOS apps. They are more deeply embedded than that and can be a major roadblock in the upgrade process. Approach them cautiously.
  4. Use Add-ons that are heavily used and updated often. This seems really obvious but I have run across organizations that are one of 50 people using an add-on that has not been updated for years. Stay on the main road and you will not be left behind.
  5. If you have a specific need do not be afraid to integrate using the API. It is powerful, well documented, and can really open up “safe” customizations using BI tools, web integrations, etc.
  6. If you use JIRA Server simply DO NOT MODIFY the database or the file structure. Lie down until the feeling goes away. Ignore all the old Confluence pages that tell you how. (I wish Atlassian would take these down)
  7. Within JIRA there are issue types specifically created by JIRA Agile. Unless you are comfortable working 100% in the way Atlassians implements Agile, create your own issue types. The behavior, features, rules etc around the Epic and Story issue types WILL change as they continue to develop their products. If you create your own issue type it will behave however you have configured it and will be far less likely to change.

If you follow these best practices (which may need to be modified over time), you are not guaranteed to completely avoid problems. But In our experience you are far less likely to be caught in a situation where an upgrade breaks your customizations. Unlike a couple of years ago we encourage customization as long as you stay on the safe path.

JIRA is easy to get, inexpensive, and generally accepted as a great tool. It is very easy to get off the safe path and into the weeds with such a configurable and powerful tool. Good training and best practices are a sensible choice.

JIRA Workflow Design Principles

Anyone familiar with JIRA understands that jumping into building a workflow without an overall plan can lead to problems. While navigating JIRA’s workflow editing tools, half of your brain is focused on your workflow design, and the other half is dealing with the tools. While I encourage new users to try their hand at the software, it is important to understand it is unlikely any first effort will be usable. Following are some suggested strategies that will help you avoid completely starting over, the normal result of a failed attempt at workflow development.

Pencil and Paper

First of all, grab a piece of paper and a pencil. A good workflow takes some thought and some iteration. Fully expect to erase and redraw statuses and transitions if you want to have a truly effective workflow. The more complex the problem domain, the longer it will take. Common mistakes that can take a long time in the editor can be sorted out quickly on a piece of paper. Having a sketch makes the work more easily done (therefore also a possible candidate for delegation).

Tasks, Time, and Resources

In my experience, a diluted focus is where even experienced JIRA users might fall down. Focus and flow are very important to the user experience. Focus can be diluted when the driving purpose of a workflow changes midstream. If a user is following a workflow focused on a task progressing through teams and suddenly has to deal with a time (deadline) based status, it can lead to frustration and mistakes. A good user experience is important in a support system like JIRA: a bad experience leads to poor performance.  I believe this focus can be achieved by a good initial decision on what type of workflow to build. I break these focuses down into three categories; tasks, time, and resources. Each one is very different, and probably should not be combined in one workflow.

Tasks

This is a natural way for many organizations to work, and possibly the best way to approach a workflow in JIRA. In this design mode you specifically map out the work based on the steps it will go through from start to completion. You should be able to easily describe statuses and needed transitions.

If you are concerned about a bottleneck in your staff capacity, inventory, or other resource issue, guard against modifying the workflow to accommodate this. For example, adding a status to the workflow to sort out an overcommitted resource will disrupt the workflow, this can better be handled within a task-based workflow by a screen popped in a transition. If you want to incorporate scheduling a coordination meeting, or other time issue, adding a status to represent this is also a bad idea. Instead, set a trigger to generate the meeting in a properly named status. Those are examples of diluting the effectiveness of a task-based workflow. If you do so, then you tend to start making workflow design decisions that can confuse users. This does not mean that capacity constraints and time considerations are not addressed. These can usually be exposed in filters and typically addressed in transitions.

Screenshot 2014-11-29 at 7.51.02 AM

Time

If your world is filled with Scrums, SLAs, or Gantt Charts, or if your workflow is completely budget driven, then you should consider a time-based workflow. Build your workflow around the processes and meetings that will occur. A good indicator of a time-based design is that your statuses look quite similar to titles in your emails and calendar events. There are lots of examples of this type of workflow, such as the one below. In a time-based workflow you can use post functions and triggers to set dates in an external system and tie the timing of the tasks to various statuses, transitions, and custom fields. If you tend to sort and look at issue lists based on date fields, then a time-based workflow might be a good choice.

Screenshot 2014-11-29 at 8.09.02 AM

Resources & People

Another way to slice through a workflow is to strongly consider resources and people directly in the design. This type of workflow is focused on capacity, issue counts at various stages in development, and looking for where you need more resources or people to maintain productivity. Statuses will be related to the functions or resources needed for a step in the workflow. A workflow designed in this way will make heavy use of custom fields, components, and automated assignment of issues in transitions. If you tend to sort your lists by assignee or component, then you are a good candidate to build your workflow this way. Including similar items to a task-based workflow as described above is natural. Make sure your workflow is consistent from start to finish with steps regarding resource allocation spread across the entire work cycle.

Screenshot 2014-11-29 at 8.27.25 AM

Silos of Work

If your workflow has more than eight statuses then you are likely going to find layout to be a struggle. One approach that can help is to think of the workflow as sections, or silos, of work. JIRA automatically does this for you by creating three categories to put your statuses in (To Do, In Progress, Done). You can take this into your layout by grouping these categories. There may also be pieces of your workflow that typically run in sequence with little deviation. Tightly group these in a small area to assist in the readability of your workflow. By thinking through this process you can avoid the spaghetti syndrome that permeates many workflows. Unfortunately, the best planning cannot prevent a JIRA update from making a mess out of your pretty workflow. But they can be easy to sort back out as long as you are using the same principles.

I show the Resource workflow example from the previous section below without this organization to demonstrate the point. I did not intentionally make it bad, I used the standard order generated by JIRA. The statuses are simply dropped in chronological order, and without some thought an intense mess can develop. Note how it is difficult to see the true flow of work.

Screenshot 2014-11-29 at 8.31.42 AM

Conclusion

When approaching the design of workflows in JIRA it is important to understand the need behind the workflow you are building, have a strong vision for that plan, and execute it with user efficiency in mind. The concepts discussed in this post are a good starting place, but there is much work to do to effectively execute a workflow. There are many good options for targeted training in this area, we recommend users start building workflows immediately and use that process as a platform to learn the system. As a user gains deeper understanding, they can immediately incorporate advanced concepts into their workflows.